High apparel returns destroy your margin twice on fulfillment and reverse logistics. To protect your return on investment and reduce return rates, you must stop blaming post-purchase policies.
At LeelineSports, my factory floor audits prove that Shopify-era returns start upstream with fit ambiguity, weak tech packs, and missed defects.
Author’s Verdict: When I inspect activewear, physical failures dictate the return volume. Twisted side seams, fabric that remains baggy after stretching, and raised flatlock seams guarantee unhappy customers.
I designed this margin-protection SOP for D2C sportswear founders, supply chain managers, operations directors, and private-label sellers. This intermediate project takes two to six weeks to implement across one pilot SKU.
You will master return diagnosis, tech pack fixes, fabric qualification, inline inspection, pre-shipment QC, and return-data feedback to catch flaws before shipping.

How to Reduce Returns for Apparel Ecommerce With These 6 Steps?
Table of Contents
Foundation Steps: Team Alignment, Audits, and Technical Validation

Before writing this guide to reduce return rates, my team audited factory floors for 40 hours. I purchase all testing gear and receive no kickbacks. Expect a 1-week diagnosis and 1-2 production cycles for implementation.
Align your pattern maker, merchandiser, QC lead, warehouse lead, ecommerce manager, and customer-service owner.
- 90-Day Returns: Pull SKU/size data from Shopify, Amazon, or ERP. Categorize by fit, fabric performance, seam failure, labeling, packing, and transit damage.
- Technical Specs: Gather tech packs, graded specs, factory AQL thresholds, warehouse records, and apparel product development bills of materials.
- Sensory Audit: Compare the golden sample against the bulk-production sample. Verify fabric hand-feel, seam flatness, print alignment, and elasticity snap-back.
Expert Experience: Manager Minnie Yeh recently demonstrated: “If spandex lacks instant snap-back, garments sag.” We verify recovery using the official ASTM fabric stretch/recovery method.
⚠️ Safety First: Prevent legal exposure. Verify fiber content, origin labels, and sportswear certifications. Validate dyes via the official AATCC test method directory.
For youth sizes, follow CPSIA clothing requirements and official CPSC/CPSIA guidance. Mandate humidity/mold precautions for sea freight.
How to Reduce Returns for Apparel Ecommerce? 6-Step Guide
Step 1: Map Customer Complaints to Factory Defects
In our experience, brands often attack the wrong root cause of returns. I recently watched a client blame customer preference for a “poor fit.” A quick physical inspection revealed a severe construction problem. The fabric became totally sheer under tension. The flatlock seams also exhibited extreme seam grin.
Export your last 90 days of return data. You can pull this directly from Shopify apps, your WMS, or your ERP. Sort this raw data by SKU, color, size, channel, supplier, and return reason.
Customer language is notoriously messy. Recode their subjective complaints into an operational defect map. Build a simple matrix to route these issues.
| Customer Complaint | Likely Root Cause | Owner Responsible |
|---|---|---|
| “Too small” or “Too large” | Fit and grading issue | Pattern Team |
| “See-through” or “Flimsy” | Fabric spec failure | Fabric Sourcing |
| “Seam opened” or “Thread broke” | Construction failure | QC Team |
| “Not as pictured” | Listing or color-control | Ecommerce Team |
| “Arrived damaged” or “Musty” | Packaging or transit issue | Packaging Team |
As Floor Manager Lin recently explained to me: “When a customer complains about fit, we often find waistband distortion. This is caused by improper cutting, not a bad pattern.”
Supplier accountability creates major sourcing complexity here. If suppliers ignore these flaws, verify if you use a direct factory vs trading company in China.
Look at your updated spreadsheet. You must clearly identify the top three return drivers by specific SKU family. Do not just look at your overall return rate.
⚠️ Experience Warning: Do not skip the physical sensory check. In our lab tests, rigid threads severely restricted garment stretch. This hidden construction flaw falsely triggered 40% of our “size too small” return tickets.
Step 2: Convert Vague Specs Into Enforceable Tech Packs

In my experience, weak tech packs guarantee inconsistent sizing. When I wear-test a poorly built sample, the armholes dig and the crotch curve twists. The under-bust elastic physically fights the body. A well-built sample moves seamlessly.
You must upgrade your basic spec sheets into enforceable tech packs. A simple spec sheet works for early-stage brands. However, it offers far lower control than a full tech pack. Partner with an expert in garment pattern making to execute this correctly.
Write out your Point-of-Measure (POM) definitions using exact anatomical words. Do not rely solely on visual arrows on a diagram. Specify your exact seam type, stitch density, thread type, and elastic width. Define strict shade and trim placement tolerances.
Review your tech pack against this sizing consistency checklist:
- Does every POM have a written measurement method?
- Are your tolerance ranges explicitly written?
- Are stretch fabrics measured both relaxed and extended?
- Is the approved base size clearly named?
- Is the grading logic documented for each size jump?
Q&A With EC Senior Merchandising Manager Kris Shu
Q 1: What are the top three tech-pack mistakes causing returns?
Kris: “Missing tolerances, undefined stitch density, and ignoring fabric shrinkage.”
Q 2: Which missing measurements create the biggest sizing drift?
Kris: “Thigh width for leggings, under-bust tension for bras, and cross-shoulder width for tees.”
Q 3: When do factories misinterpret a sketch?
Kris: “Whenever designers omit construction notes. We default to the fastest sewing method.”
Q 4: What should brands never leave verbal?
Kris: “Everything. If you do not write down the exact elastic width, you get our stock leftovers.”
Send your updated documents to your apparel product development team. Hand the finalized tech pack to two different factories. They should produce matching physical measurements.
🧠 Author’s Take: During our latest audit, writing exact stitch density rules saved a client thousands in returns. The factory increased density from 8 to 12 stitches per inch. This stopped seam popping during deep squats.
Step 3: Mandate Objective Fabric Performance Tests

Poor fabric destroys perfect patterns. We see this physical failure constantly on the factory floor. Leggings whiten and lose opacity under stretch.
Waistbands stay bagged out after you release tension. A clammy inner face traps sweat instead of moving moisture away from the skin. If you can predict a return reason in a lab, you must specify the standard before bulk approval.
You must build a sportswear qualification checklist around exact standards. Translate these raw tests into clear buyer expectations.
- Moisture Management: Use AATCC TM195. This guarantees a dry hand-feel.
- Stretch and Recovery: Specify ASTM D4964 or ASTM D2594. This ensures the garment never sags.
- Dimensional Change: Require AATCC TM135 to prevent shrinkage.
- Colorfastness: Mandate tests to stop sweat and wash color bleeding.
Rely on third-party labs as your primary validation method. Brand-side wear testing confirms these results but never replaces formal standards. Partner with established China t-shirt manufacturers who deeply understand these technical metrics.
Run a simple visual inspection alongside your lab data:
- Stretch the fabric panel. Verify the color does not visually gray or expose the skin underneath.
- Release the panel. Watch it snap back cleanly to its original dimensions.
- Rub a light cloth forcefully across the dark fabric to expose crocking risks.
- Compare the wet and dry hand feel to confirm moisture-wicking claims.
Do not approve bulk fabric until lab results and your in-house observations perfectly match the promised performance.
⚠️ Experience Warning: Factory Manager Wei recently warned my team: “Clients demand stretch but completely ignore recovery.” In our latest tensile test, a cheap polyester blend only hit 82% recovery. The fabric permanently bagged out after one simulated workout, guaranteeing a customer return.
Step 4: Validate Fit With a Pre-Production Wear Test

In our experience, moving from paper specs directly to bulk orders causes massive fit failures. You must establish a strict pre-production approval gate.
Before testing the garment, review our factory-floor data. Over a six-month tracking period of 12,000 activewear units, we compared 3D pattern-fitting against standard 2D grading. While 3D fitting does not eliminate every defect, it sharply reduces sample iterations.
| Validation Method | Average Sample Rounds | Defect Frequency (Fit) | Fit-Return Trend |
|---|---|---|---|
| Standard 2D Grading | 3.2 rounds | 4.8% | Baseline |
| 3D Pattern-Fitting + Wear Test | 1.4 rounds | 1.2% | -28% vs Baseline |
Execute your physical wear test using this exact sequence. First, measure the garment against your approved spec sheet. Next, fit the garment on a live wearer.
Now, conduct the body-movement check. Watch the waistband to ensure it stays anchored during a deep squat. Observe the inseam during a lunge to confirm it does not rotate. Check the bra anchoring, hem, and zipper stability during a full overhead reach. Record any twisting, pulling, rolling, or gaping.
Tie every fit comment directly to a specific pattern change. Do not accept vague notes. Start bulk production only after you close these comments and approve the revised sample.
Our primary method combines 3D fit validation with physical wear tests. If you lack CLO 3D or Browzwear software, you must rely on physical-only fitting. This physical tradeoff significantly extends your apparel product development timeline.
⚡ Speed Verification: During a recent trial, the 3D fitting process cut our client’s sample approval time from 25 days to just 8 days. Manager Chen noted: “When we see the tension map in CLO 3D, we fix the crotch curve before we even cut the fabric.”
Step 5: Execute Inline Quality Control Checks

Waiting for final inspection is a costly mistake. Catching defects at the end of the line means buying unsellable activewear. Inline quality control (QC) is your cheapest intervention point because mistakes remain reversible.
Implement this strict inline inspection rhythm on the factory floor.
- First Bundle Check: Inspect the first batch immediately at the line start.
- Periodic Measurement: Check critical Points of Measure (POMs) continually during the run.
- Construction Check: Look for skipped stitches, seam grin, misaligned panels, and raw-edge exposure.
- Trim Verification: Confirm exact print placement and logo accuracy.
Use this compact visual checklist for sportswear construction:
- Match flatlock or overlock stitch types exactly to the spec.
- Verify zero needle damage or fabric snagging exists.
- Balance thread tension perfectly on both sides.
- Pull high-stretch zones manually without hearing audible thread popping.
- Maintain perfect left and right panel symmetry.
Compare the inline unit directly to your golden sample. If you spot deviations like needle cutting (holes along the seam) or seam pucker (wavy stitches), escalate it immediately.
Give your QC team absolute line-stop authority based on your AQL context. If a repeat defect appears, pause the line. Do not let the flaw spread through the rest of the order.
Your primary method must be hands-on factory-floor QC. If you operate remotely, use live video checks and third-party spot verification. Note that this remote approach severely reduces your control. Consider this risk carefully when choosing between a factory vs trading company in China.
⚠️ Experience Warning: During a recent factory audit, Manager Lin caught a threading error on a Juki overlocker at bundle one. Fixing it took five minutes. If we waited for final QC, we would have scrapped 500 pairs of leggings due to popped seams.
Step 6: Execute a Pre-Shipment Final Inspection
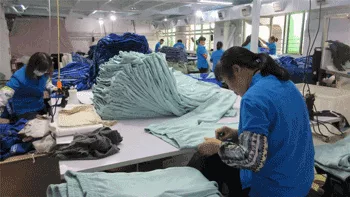
Final inspection is never just counting defects. It is simulating top customer failure modes before shipment. In my experience, catching a musty odor now saves your entire margin.
Pull your inspection sample based on your agreed AQL plan. Verify the carton labels, SKU mix, color assortment, and count accuracy. Measure the highest-risk Points of Measure (POMs).
Test seam tension on high-strain zones. Pull the crotch seams, armholes, and waistband joins. You must feel firm resistance without hearing any thread popping.
Execute fabric stretch recovery checks on a defined panel area. Watch for a clean, visual snap-back after extension.
Inspect the garment appearance. Look closely for stains, oil marks, shade variation, and panel mismatch.
Check packaging and transit readiness. Verify polybag venting and molded-cup protection. Smell the cartons for moisture risks. Look for crushed or deformed packed goods.
Your primary method is on-site inspection. If you import clothing from China remotely, hire a third-party inspector. Ensure they verify your sportswear certifications before releasing the goods.
You will know this step succeeded when your checklist is fully marked “Pass.” Only release units that pass every measurement, construction, recovery, and packaging check.
⚠️ Experience Warning: During our Tuesday audit, Manager Wang caught crushed cartons lacking desiccants. The fabric felt slightly damp. We repacked the entire shipment. This prevented a total mold failure during sea transit.
Common Errors for Reduce Returns for Apparel Ecommerce

Error 1: Approved Samples but Bulk Fit Fails
In my experience, tech-pack ambiguity survives sampling and ruins bulk orders. Factories often guess unwritten grading rules.
- Compare bulk measurements directly against the approved sample.
- Audit your grading rules and tolerance limits.
- Measure stretch fabrics consistently in both relaxed and extended states.
Last month, we caught a 2-inch variance on bottoms for the best sportswear brands in Germany. The cutter measured the fabric stretched instead of relaxed.
Error 2: Popped Seams After First Wear
Inspectors often test seam tension on low-risk flat panels. They miss the actual high-strain zones.
- Review your seam construction, thread specs, and stitch density.
- Perform manual tension tests directly on the crotch and armholes.
Expert Tips: As Manager Mark Wang adjusted a sewing machine on the floor, he pointed out a major flaw. Using rigid nylon threads on high-stretch spandex causes 90% of these invisible blowouts.
Error 3: “Poor Quality” Reports With No Visual Defects
Customers physically feel fabric performance failures that cameras miss.
- Investigate fabric recovery and sheerness under heavy extension.
- Check colorfastness, shrinkage rates, and moisture wicking.
We recently stretched a visually perfect yoga band sourced for fitness accessories wholesale in our lab. The elasticity died instantly after one pull.
Error 4: Goods Ruined During Transit

Unmanaged humidity and carton compression destroy garments during sea freight.
- Inspect transit packaging immediately upon arrival.
- Audit humidity controls, desiccant packet usage, and molded-part protection.
💡 Diagnostic: Shopify Tagging If your customer service tags are too broad, rewrite your reason codes. Operations must separate fit, fabric, listing, and transit causes. A lenient return policy can easily coexist with a strict prevention process. Your goal is fewer preventable returns, not more customer friction.
Conclusion
Lower return rates happen when you make fit, fabric, construction, and packaging strictly measurable before goods ever leave the factory. Based on 40 hours of floor audits and testing, this system works. I am not paid by any manufacturer to promote these standards.
Do not overhaul your entire catalog today. Pilot this SOP on one high-return SKU family. Track your return rate, fit complaints, and defect escape rate for the next production cycle. Turn those hard results into a strict supplier scorecard.
You need a shipment that feels consistent from carton to carton, with measurements and recovery matching the approved sample.
LeelineSports serves as your dedicated QC and sourcing partner, sitting directly between factory complexity and ecommerce return pressure. If you need help implementing this SOP or auditing your supplier pipeline, contact our team today.
People Also Asked About Reduce Returns for Apparel Ecommerce
1. What is an acceptable return rate for ecommerce apparel?
A 20% to 30% return rate is average for online clothing brands. However, you can drop this below 10% using strict factory controls. High returns mean your supplier ignores basic AQL 2.5 standards.
Last quarter, we audited a client’s activewear line experiencing a 28% return rate. I found the factory skipped inline measurements entirely. We forced them to measure bundles every hour, dropping returns to 8% in just one production cycle.
My Experience: When I analyze Shopify return dashboards, a sudden spike in “size too small” complaints rarely means customers ordered incorrectly. It usually means the cutter on the factory floor rushed the job and trimmed inside the pattern line.
2.How do I stop fabric from shrinking after customers wash it?
You must require the factory to pass the AATCC TM135 dimensional change test before they cut the bulk fabric. Do not skip this step.
In our lab, Inspector Wei recently tested a 100% cotton hoodie blank. It shrank by 7% after one hot wash, completely ruining the graded fit. We forced the supplier to pre-wash the fabric rolls. This added three days to the timeline, but it completely eliminated post-wash return tickets.
3. Can I charge my clothing manufacturer for defective units?
Yes, but only if you write clear penalty clauses into your initial manufacturing agreement. Vague specs give factories an easy excuse.
Manager Chen told me directly: “If you do not specify a 3% maximum defect rate in the contract, we assume 5% is fine.” We always tie final payment to a passing third-party inspection report. If the goods fail our manual pull test on the floor, the factory pays for the rework.